Sunday, July 21, 2013

How to paint a Dark Angels Space Marine

Here is my entire process for painting a basic Dark Angels Space Marine. I tend to spend a bit more time per miniature than most people, so this method does take a bit of extra time. 

I apply all paints to my pallet using the following method: one drop on the end of a brush applied to pallet. One droplet of purified water placed on pallet (not mixed yet). Dip brush into water droplet and then mix with paint. Repeat until the paint is roughly the consistency of milk. You might need more or less depending on what you're painting but that's the basic mixture for all the basic stuff below.The brushes I use are the Citadel Detail Brush (yellow end), the Citadel Wash Brush (dark purple end) and the Citadel Small Drybrush (light blue end). Cost about $8 each.

The only 'techniques' I really use are a bit of drybrushing here and there. However, all of my paints are applied using multiple coats. This is time consuming but I believe it produces a much cleaner and more even looking paint job. Basically, you apply the first coat of paint, wait a few minutes and apply a second. A third might be needed if it still looks a little patchy or there are areas that need touching up.

Now, on with the processes:

Prepping:
Step 1: Prime with Chaos Black spray paint.
Step 2: Touch up missed areas with Abbadon Black. (Not needed if you don't fuck up the spray painting like I do).
Step 3: Base coat the basic armor panels and backpack in Caliban Green. Leave black showing in deep crevices in armour.
Step 4: Heavy wash with Biel-Tan Green. (This is optional. I like the shade of green it produces when it's all dried.)

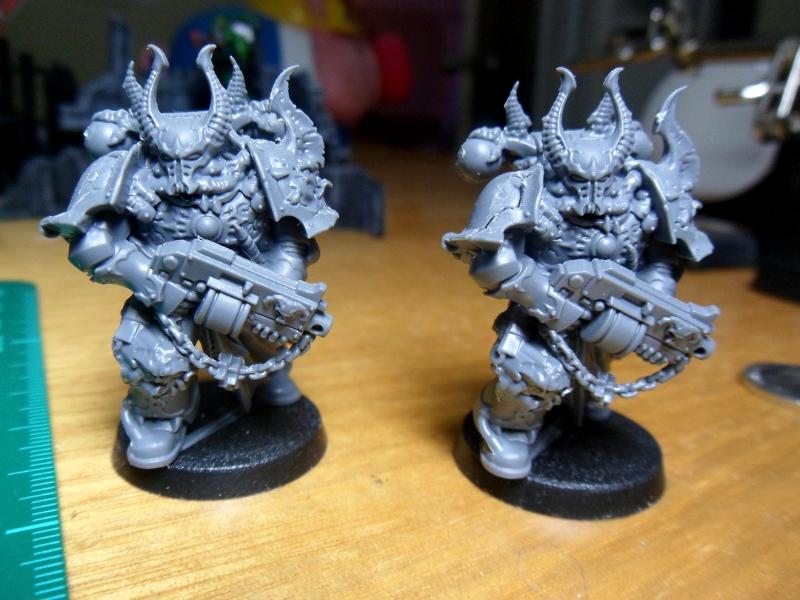
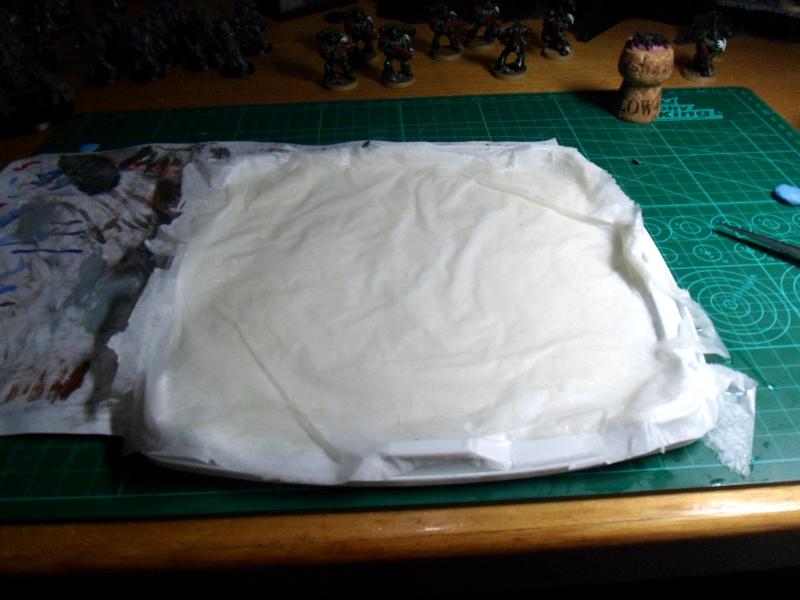
Base Marine now prepped for detailing.

Prepped and ready to go.

Detailing: 

I consider anything after the above initial steps as detailing work.

Chest-plate:
1: Base in Zandri Dust
2: Heavy wash of Seraphim Sepia, and allow to dry upside down. This allows the wash to run into the gaps and cracks where it would naturally look darker.
3: Highlight with Ushabti Bone. Cover almost everything but leave some Zandri Dust showing in the recesses.
4: Highlight again with Screaming Skull. Only on the raised edges and the very tips of the 'feathers'.
5: Final light wash with Sepia. For this wash only load the tip of the brush and try to cover the flat surfaces instead of letting it build up in the crevices. Leave it to dry upright, so the wash runs down towards the models feet. 

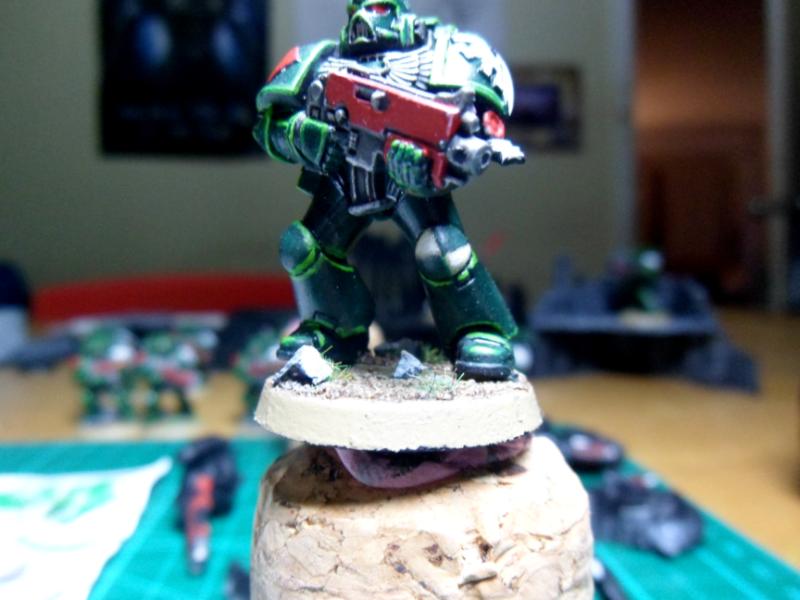
Bone breastplates. The colour is a bit washed out in this picture. They have more depth under normal light.


Heraldry/Squad/Chapter Markings: 
1: Winged Sword on left pauldron painted Ceramite White. Thinned paint applied in multiple coats works best to get a solid, consistent look.
2: Tactical markings on right pauldron painted Mephiston Red.
3: Iconography on weapons/pack painted Balthzar Gold over a thin coat of brown. The brown helps the gold to pop a bit better. Thin yellow also works but looks a bit cartoony for me.
4: Left kneepad company marks freehanded. White base for the checks built up to screaming skull for an off-white bone tinge.

Freehand company markings on the kneepad. A bitch to paint but worth it.


Fine Detailing:
1. Eye lenses painted Mephiston Red. I really need to work out a better technique for eyes.
2. Purity Scroll wax painted a shade of red.
3. Parchment painted white.
4. Black lines (representing text) painted on parchment in Abaddon Black.
5. Rivets on gun/backpack/anywhere else painted Leadbelcher.
6. Gun casing painted Mephiston Red.
7. Gun metal based in Leadbelcher. 
8. Joint tubing painted in Leadbelcher, but just lightly over the raised surfaces.
8. All Leadbelcher parts washed with Nuln Oil. 

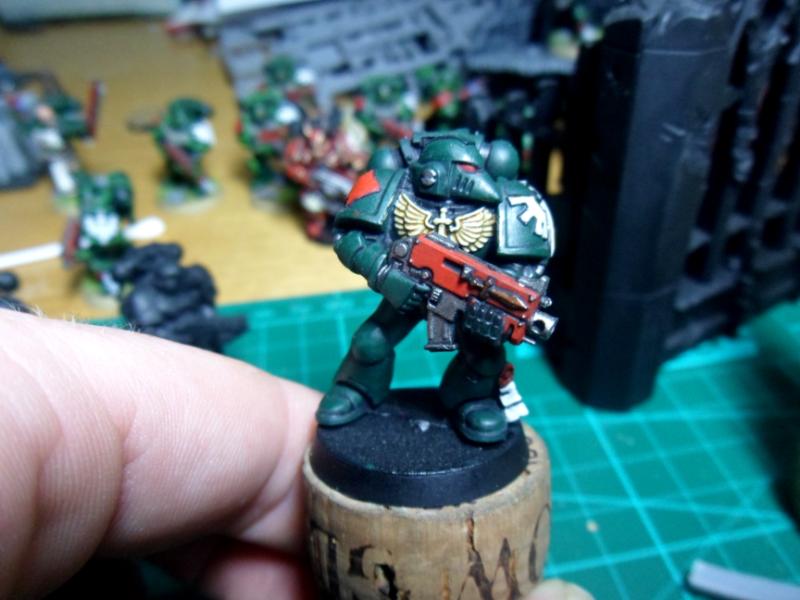
All major detailing done. Time to move onto the highlighting.


Highlighting:
1: 50:50 Caliban Green, Warpstone Glow - all edges. Pretty un-noticeable once applied.
2: Add another 25% Warpstone Glow to the mixture already in use - all corners and far out onto edges.
3: 50:50 Warpstone Glow and Moot Green. Quite bright. Only on most corners and a little bit out onto the edges.
4: 100% Moot green. Only on the very corners/very hard edges where light would catch sharply.
5. All leadbelcher parts highlighted with Ironbreaker.

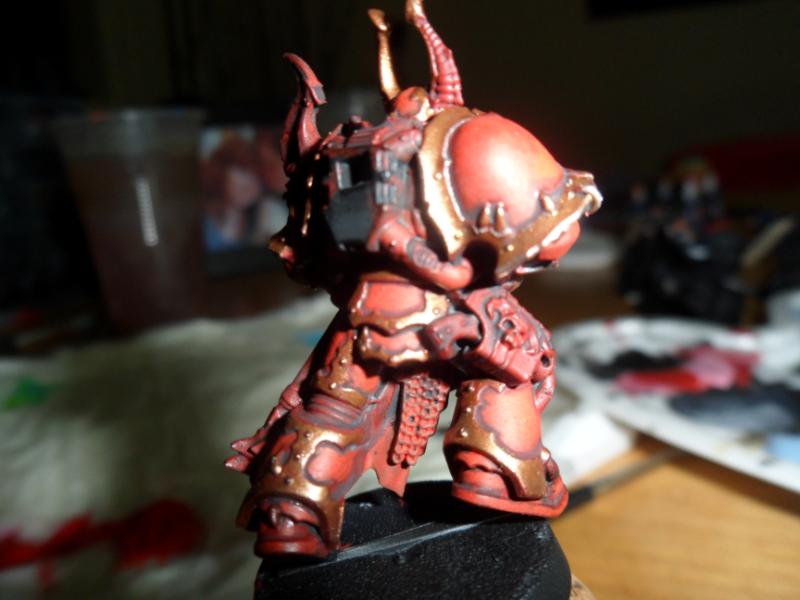
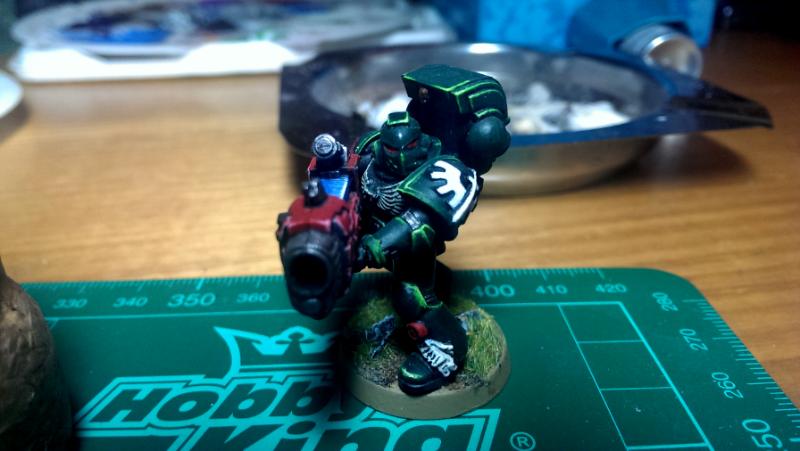
The corners are where light catches the most. The edges slowly fade out to give the appearance of 'shine'.

That is essentially the marine himself done. Now it's just the base. Some bases are works of art in and of themselves but I prefer a reasonably simple approach because I hate doing the bases, lol.
Basing:

Glue the model to the base first. It's a fucking pain in the ass trying to do this later. Just do it. It will save so much hassle and look better in the end.
1. Paint base Zandri Dust all over.
2. Glue sand to top.
3. Once dried, brush sand with 50:50 PVC Glue / Water solution. This will harden and provide protection and make it much easier to paint.
4. Heavy wash with Seraphim Sepia. Make sure all glue is very very dry first. I usually let it dry over night just to be safe. Allow the wash to sink into the sand. If the glue is not dry this will fuck up all the sand.
5. Good drybrush with Zandri dust. Drybrushing just catches the top of the sand, leaving the sepia showing through underneath and looks quite good I think.

Base prepping done.

Details:
1. Cut up wine corks into acceptable rock shapes. Should be fairly random looking/rough. You can really use any rocks you like, but I enjoy making my own.
2. Paint cork black.
3. Drybrush cork as follows: Heavy brush of Administratum Gray > Light brush of Celstra Grey > Extremelly extremelly light brush of Ceramite White and only over the very hard edges. You now have rocks.
4. PVC Glue rocks to sand base in random patterns. Apply 50:50 PVC/Water to solution again once rocks are dried to base. This will harden everything up and provide protection.
5. Smear PVC Glue on the base where you want grass to be. Can be over, around, under rocks but should not cover whole base.
6. Use tweezers to apply flock grass. Shake gently to remove excess. Use tweezers to get things looking the way you want. Make sure to brush all traces of flock from the edge of your base and feet/legs of marine. Hard to get them off later. 

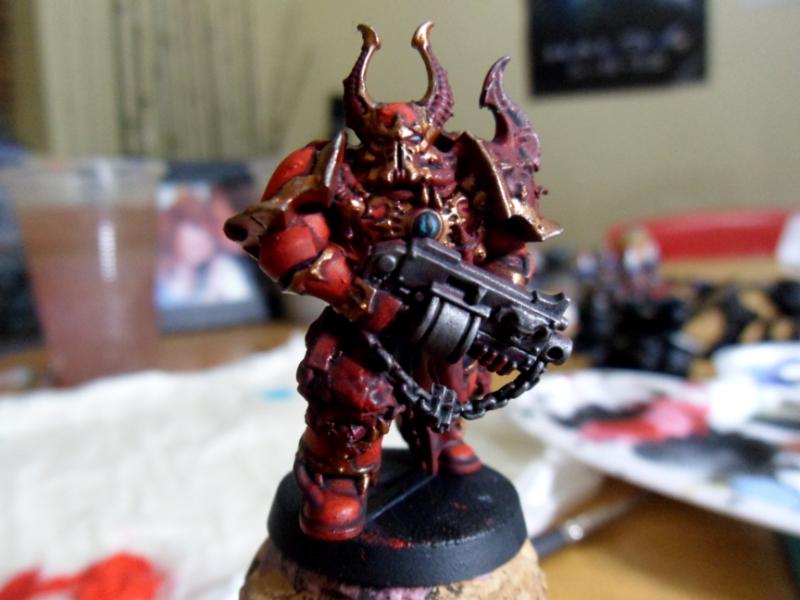
Allow to dry and you have a finished Dark Angels Space Marine.  

Repent! For tomorrow you die!


Saturday, March 2, 2013

Blog Update

For your reading convenience I have updated the reviews page to contain links to all the reviews I have written and changed the About Me (or as I like to call it, the Narcissism page) page to a Fiction & Short Stories page with links.

Expect to see more stuff coming soon. 

Crimson Slaughter Test Models


As promised an update! All of the pics should be clickable for larger versions.

Here are the first two test models, primed and ready to rock:


I then gave both the models a heavy wash in Nuln Oil to bring out the depth and shadows:


After that I moved onto working on the black based model only. I started by buffing up the armour plates with the same red I used for the base coat and then doing the trim in gold.


Once that was done I dry brushed the bolter a metallic colour but left some of the red showing through. I think it gives it an older, corroded look which I like. I moved onto the highlights, buffed the red with a mix of the original base colour and a lighter red to really bring out the armour sections and I went over the gold with a lighter gold. Then I highlighted the very edges with silver to make the gold 'pop'. This needs to be redone with a mix of silver and gold as they're too silver at the moment. Finally, I did the breastplate eye and the eyes in turquoise  I used a black wash to get the darkened effect around the eye on the chest.


And that is where I am at as of now. Next up all the detail work and the power pack will get done and then the base, finishing this guy off. I haven't decided how I am  going to base these guys yet, so they might remain incomplete for a little while. Then the second model will get the same treatment so that I can compare whether a black or white prime looks better. Then, it's on to the Helbrute!

Thanks for reading. If you'd like to check out any of my other models or photos you can find them in my Dakka gallery here.


Monday, February 25, 2013

Monstrous Painting Competition

My friendly local Games Workshop is holding a painting competition which I have decided to enter. This one is for big models and I have decided to paint the Helbrute Dreadnought, Mortis Metalikus from the Dark Vengeance starter set. It will be the first model I've entered into a competition and I will be keeping a progress log here and also on the Dakka forums.

Here's the beast, ready for priming:


I will be going with the default Crimson Slaughter paint job as I quite enjoy the fluff surrounding the Dark Vengeance kit. Firstly, I'll be painting up two of the Chosen that came with the kit so that I get a bit of practice on the overall colour scheme that I'll be going with:


Here are the steps I'm going to use on my first test model:

1) Prime with Citadel Chaos Black spray paint

2) Base entire model in Mephiston Red
3) Heavy black wash

4) Paint all metallics
5) Block red back in with Mephiston Red
6) Highlight red with either Evil Sunz Scarlet or Wazdakka Red.

I haven't yet decided how I am going to do the detail work such as the horns or the flesh tones on the Hellbrute itself. I am looking for a reasonably bright arterial look for the red on the armour  like fresh blood and so I was thinking of a paler, deader looking skin to contrast.

I have also made myself a wet pallette using the tutorial I found on Dakka. It works great!


Stay tuned as I will try and post at least one update a week on how this is going. 

Friday, February 22, 2013

Dark Angels 5th Company Update

So I have decided that my goal with my 'Warhammer Obsession' from my last note will be to collect the entire 5th Company of Dark Angels. It's ambitious and I think it'll take me a fair while to accomplish, but it'd be really cool. If I can do it within a reasonable time frame (a year or so) then I might think about trying to collect the entire Dark Angels Chapter as an extremely long term goal.

5th Company is comprised of a Company Master, 6 Tactical Squads, 2 Assault Squads, 2 Devastator Squads, Dreadnoughts and Rhino's.

So far my 5th Company has -

Company Master Balthazar (HQ), Master of 5th Company, holder of the Keys of Correction and Seeker of the Truth.

Librarian Turmiel (HQ, from the Librarius, assigned to 5th)
Interrogator-Chaplain Seraphicus (HQ, from the Chaplaincy, assigned to 5th)

1st Tactical Squad: Raphael

2nd Tactical Squad: Vasari

Also I have the beginnings of 1st Company (1 squad of Deathwing) and 2nd Company (1 Ravenwing combat squad). I will be trying to score most of my models cheap off eBay and I'll be trying to run a few conversions to make my guys look a bit more unique than just the standard Space Marines. I have some bits coming to differentiate Sergeant Vasari even more from Raphael and my eyes are peeled for cheap Dreadnoughts and Rhino's as I'd really love to paint one.

Finally, I have decided to paint all the correct Company and Tactical markings on each squad... wish me luck. :s

Here are some WIP photos of 5th company so far:

(My full gallery of pictures in larger sizes and better quality, including my partners Eldar and soon my Chaos Space Marines, can be found on my Dakka gallery here:Paint_To_Redemption's DakkaDakka Gallery )


Wednesday, January 30, 2013

Blog Direction

So I've been running this blog for a while now and it's occurred to me that it doesn't really have a direction. I just post what I want when I want and that seems to be that. I do enjoy writing and reviewing but I find it hard to get motivated unless something really strikes me. So for the time being I think a lot of this blog is going to focus on my Warhammer stuff as I am really enjoying painting, modelling and the few short games Suzanne and I have played so far.

Hopefully you guys find some of the stuff I write interesting. Stay tuned, there will be other stuff posted on here too. I still have a few game reviews in the works that I hope you'll all enjoy.

If any of you have comments or suggestions on my writing style or the things that I write about, drop me a comment below. Constructive criticism is  something I am always looking for. 

Monday, January 28, 2013

Warhammer Obsession


Greetings Brothers and Sisters. May the guiding light of the Emperor illuminate your lives on this day. I thought that it might be fun to throw together a post detailing some of my current Warhammer obsession.

I have been into Warhammer as a hobby since I was about 13. I started collecting a Tyranid army back then and still have a soft spot for the gribbly little guys, however the Emperor's Finest have always been my inspiration. I enjoy the Super Solider and Trancended Humanity/Loss of Humanity themes that always run through Space Marine narratives and plus... Bolters. So, after much cajoling (I asked nicely) Suzanne Rogers bought me a Dark Vengeance box set and a Citadel Starter Paint kit for my birthday last year. She also went as far as to buy me a huge desk on which to model too!  


Dark Vengeance, Paint kit and some old Space Marine sprues from years ago.

Da big desk!
 Gleefully I started to practice on a few old Space Marine models that I still had.  Since I wasn't planning on actually playing these models, I posed them with whatever weapons I felt like. 


I think I did a pretty good job on these guys, considering that I didn't have the right paints, brushes or any real idea of a colour scheme other than 'Dark Angels'.
My first attempt at a 'tricky' base.
 These initial models were painted using the colour Waagh! Flesh which I darkened with Imperial Primer. I think the colour is quite good and is really close to the Caliban Green I use on all my models now. For my first painting attempt in 10 years I was really happy with how these guys turned out. 

My first attempt at drybrushing an entire model. I don't use this technique on my good models, but I thought it looked cool here.


Once I was reasonably happy with how my practice models were coming along I switched over to the new Dark Vengeance models. For anyone considering Dark Vengeance, I would highly recommend it. The models are top quality, full of detail and while the new Snap Fit design does mean you lose all the posability, it didn't bother me. By now I had hit up my local game store and picked up a bunch of new brushes and paints, including all the ones I'd be using for my colour scheme: Caliban Green for the base. Beil-Tan Green and Nuln Oil for the washes. Warpstone Glow for the highlights and Moot Green for the extreme highlights. Mephiston Red for the weapon covers (although I need a different red for highlights which I still haven't gotten yet).   Leadbelcher and Ironbreaker for the metalics like the Bolter and Balthazar Gold and Griffon Gold for the... gold bitz.

|


The Eldar in the background are Suzanne's. For her first ever painted models I think they look epic!

Plain Vs. Highlighted
After a week of painting nothing but tactical models I got a bit bored of highlighting and decided to start on my Bikers:


So that is where I currently am with my obsession. All of my models have been cleaned up (mold lines, contact points etc) and snapped together in the last few days and Suzanne and I have had our first few Skirmishes with the DV models (Dark Angels Vs Chaos) with the Dark Angels winning both matches easily so far. The armies do seem to be a bit weighted in the Angels favour though as they have 3 HQ choices to Chaos's 1 and their Infantry choice is a 10 Man Tac squad with a Plasma Gun and Plasma Cannon vs Chaos' 2x 10 man Cultist Squads with Autoguns who basically just get chewed up in the first few turns. Even the addition of the Hellbrute Dreadnaught can't seem to turn the battle in Chaos' favour.

And finally here is my to-do list:
Dark Angels:
Finish 10 man Tactical Squad
Finish Ravenwing Bikers
4x Deathwing Terminators and Seargent
Librarian Turmiel
Interregator-Chaplain Seraphicus
Company Master Balthazar 

Chaos:
20x Cultists and Cultist Champions
5x Draznicht's Chosen Chaos Space Marines and Draznicht
1x Hellbrute Dreadnaught
1x Chaos Lord